Many times a person new to photography will think they have an image in perfect focus, yet when they view the photo’s in Photoshop (or whatever processing software you may use), or when they get their film back (if they happen to be shooting film) they find the image is unclear, fuzzy, and not what they expected.
Images that are small may appear fine but when you try to make a larger print you find the image may become unacceptable. The objective is to achieve perfect focus that will hold up even when the image is enlarged to greater sizes.
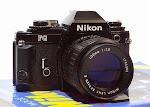
With the nice auto-focus lenses that are offered today, you would think that this article is pointless, but what about the many great manual focus lenses that are out there? Many people are using some great old MF lenses on their new digital cameras.
Some samples :
In Focus

Out Of Focus

At first glance both pictures may seem passable, but when we take a 100% crop from each picture we can see the difference.
In Focus Crop

Out Of Focus Crop

As you can see it’s important to know your cameras focusing system. To achieve professional looking photos you need to be able to focus with perfection, “good enough” just won’t cut it. There are some basic professional techniques that will help you get perfect focus every time.
THE TECHNIQUES OF FOCUSING
How you focus your camera will depend upon the camera you are using. As I mentioned in an earlier post, different cameras use different focusing devices. Many cameras offer you a few choices of different techniques for focusing, allowing you to choose the method best suited for any given situation.
FIXED FOCUS
Some cameras (mostly inexpensive point and shoots), have fixed focus. You can’t change the focus. Objects that are more than a few feet from the camera are in fairly decent focus, while object closer than this distance are out of focus.
If your a professional, and plan on doing some creative work, you will need some way to vary the focus on your lens. Sometimes you will need to focus on objects sitting in the far distance, while other times you will need to focus close up. You want to be in perfect focus no matter what the distance. As I said, “good enough” wont cut it.
HOW A LENS FOCUSES
Focusing a lens requires moving the lens forward or backward in small increments. A standard SLR / DSLR employs lenses that require the user to twist the barrel on the lens to move it forward or backward, this can also be achieved by a motor built into your lens or camera body. By moving the lens you change the distance on which it is focused.
A good starting point to achieve good focus is to measure the distance to your subject, then set your lens for this distance. This may not be the typical approach, but it’s a good place to start and will help you begin to grasp focusing systems.
Bachrach Studios used this method for many years; they shot all their basic portraits using a string attached to the camera. The string consisted of knots each placed a foot apart. This allowed them to know exactly how far the subject was from the camera.
THE FOCUSING SCALE
Most lenses are equipped with a focus scale, also known a distance scale. The scale is a group of numbers marking the distance in feet / meters. If you’re unfamiliar with these numbers I suggest taking a look at one of your lenses.
In the center of your lens barrel you will find a marker. If you wanted to focus on an object that you knew was 5 feet away, you would simply line up the 5 foot marking with your center marker.Be aware that as you rotate the barrel to the 5ft. marker you also move the lens in or out. At the point when 5ft. lines up with the center marker, you have achieved the sharpest possible image for any object 5ft. from the lens.
If your subject where 8ft. away, you would simply line up the 8ft. mark with the center marker and so on.
Example:


Take a close look at the focusing scale on your lens. You will notice the distance markings go from the closest range your lens can focus to a distance called infinity beyond everything that is in focus. On most lenses infinity is marked with a symbol. (See photo below). Whenever you want to get distant objects into focus simply line up your infinity marker with the center marker.

Using the focusing scale by itself is not very convenient. You will find that in many cases you don’t know the exact distance to your subject, and you need to rely on your camera to figure it out for you.
What you need is a system that you can look into the viewfinder, point your camera toward the subject and do something that will bring the image into perfect focus. As I already mentioned there are a few systems that will allow you to do this.
1. Groundglass Focusing
2. Rangefinder Focusing
3. Automatic Focusing
GROUNDGLASS FOCUSSING
This is the most common viewing system. This is the system you will find on SLR’s, DSLR’s, Twin Lens Reflex (TLR’s), and View Cameras.
If you use a DSLR, when you look in the viewfinder you will see an image of your subject projected on the groundglass. One way you have to focus is by twisting the barrel of your lens until the subject becomes perfectly sharp. Once your subject appears perfectly sharp you will know the image reaching your sensor is perfectly sharp also.
You may ask, “How do I focus using ground glass”, or “How do I know when I have perfect focus?”
First and foremost you need to decide on which point of the subject area you want to focus on. This will all be a creative decision based upon what you, the photographer wants to convey. As a photographer you must decide on a theme you would like your photo to express. Once you have decide upon your theme, you usually would want to draw attention to most important part of your story by focusing in it. A good way to focus on your subject would be to throw everything else out of focus, which surrounds your main subject.
How about portrait’s, which part of the face should you focus on? I think it would be obvious the EYE’s are the windows to the soul, so focus upon the eyes
Once you have decided upon your focusing point, the question becomes “How do I achieve perfect focus?” The answer is, by zeroing in. Simply move your focus control in one direction until your image becomes perfectly sharp on your groundglass, keep turning your focus control past this point until the image starts to blur. Now move your control in the opposite direction until your image becomes perfectly sharp again. Move the focus control back and forth until you have zeroed in; you can also rock your upper body back and forth until perfect focus is achieved.
RANGEFINDER FOCUSING
Some SLR’s offer another method of focusing. In the viewfinder you find a small circle that will display a double image when the subject is out of focus. This is the same system used on many early SLR’s.
There are two types of Rangefinder images.
1. Superimposed
2. Split-image
The superimposed image will display two side-by-side images of your subject. To focus you bring them together until you see one image.
The split image system seems to be split across the middle, either horizontally or vertically. As you focus, the two halves will line up together.
A FEW TIPS
1. The closer you are to a subject the more important accurate focus becomes. The further your subject is from you the more tolerance you have with focusing. I your subject is 30 or 40 feet from you, your focus can be off a foot or so and you will still get a reasonably sharp image. But if your subject is 4 or 5 feet from you a difference of 1 inch in focus will cause an unacceptable image.
2. To reach perfect focus of a near object, get a perfectly focused image on your groundglass, and then rock your body back and forth a few inches while observing your subject. As soon as you see the sharpest image, shoot.
3. If you are shooting a moving object coming toward you or moving away, preselect and focus on a point at which you will want to take you photo.
4. To bring the distance into focus, simply set your distance scale to infinity. If you would like to have the distance and foreground in focus, set your lens to its hyper-focal setting. I will discuss hype-focal settings later in the lessons.
AUTOMATIC FOCUS
Here is the third and very popular focusing system. Simply point your camera at the subject, and it measures the distance, adjusts the lens and automatically brings the lens into focus.
Auto-focus systems for the most part work like radar. A beam of infra- red light or an inaudible sound is transmitted from the camera, bounces off the subject and is redirected back to a computer chip sensor in the camera. This chip will calculate the micro- seconds of time the beam took on its round trip journey and calculates the distance. The microchip instructs tiny servomotors to move the lens to bring it into focus.
FOCUS LOCK
Most modern 35mm DSLR / SLR offer focus lock To use focus lock, simply center your subject , focus, press the shutter-button halfway down, now your focus should be locked and you can reframe your image. Keep in mind that you need to keep the shutter button pressed half way down while you reframe your shot.
MANUAL OVERRIDE
Auto focus is a nice tool and it make life easier, but to gain full creative control over your camera you need to be in manual mode. Most SLR / DSLR give you this opportunity by offering manual focus override.
I know some people have weaker eyesight than others and feel they need auto focus, or perhaps you shoot fast paced sports and auto focus seems a necessity, this is all fine. Shoot which ever way makes you comfortable.