Tuesday, January 11, 2022
Monday, August 24, 2009
Prt.12 SHUTTER SPEED
SHUTTER SPEED
I have talked about aperture and how we can use it to control depth of field, now it’s time to take a look at shutter speeds.
What is a shutter? The shutter is a mechanism, which allows light to reach the film or digital sensor for a precise length of time.
Today most cameras are equipped with a mechanical or electronic shutter, which allows user to select speeds at a fraction of a second.
Sample of shutter speeds:
1- second
½ - second
¼ - second
1/8 – second
1/15 – second
1/30 – second
1/60 – second
1/125 – second
1/250 – second
1/500 – second
1/1000 – second
1/2000 – second
1/4000 – second
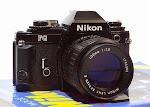
If you look at the sample picture below of the shutter dial you will notice these speeds are marked as: 1, 2, 4, 8, 16, 30, 60, 125, 250, 500, 1000, 2000, and 4000.

The sample picture of the shutter speed dial is from an old Nikon FE2 film camera. On newer digital cameras these setting will be found on a LCD screen. The speed settings remain the same from film to digital.( 1/100 on a film camera is the same as 1/100 on a digital camera)
IMPORTANT:
Notice: as you move from one speed to the next fastest speed, you cut the exposure time in half.
Example: 1/500 allows light to reach the film or digital sensor for half the time allowed by 1/250.
This is the function of the shutter speed; to control the light reaching your film or sensor. The shorter the time the less light, if you cut the time in half you have cut the light in half.
I have already discussed how we can control the light by changing the aperture. As you should know: the larger the aperture the more light is admitted, the smaller the aperture the less light.
So what have we learned? There are two ways to control the light entering your camera: Shutter Speed & Aperture.
Shutter Speed Settings
When using the older film cameras in manual mode you will set the shutter speed manually and most likely be forced to use one of the specific speeds indicated on the dial or LCD screen. On many older film cameras you simply don’t have a choice of setting the speed other than what’s indicated on the dial or LCD screen. You cant set an intermediate shutter speed of say 1/556. You’re simply forced to stick with the numbers on the dial.
If your camera offers aperture-priority the camera will set the exact exposure. In this setting you set the aperture and your camera will set the exact shutter speed for proper exposure. In this way it is possible to achieve the 1/556 setting or any other fraction within the cameras limits. Ordinarily you cannot set these in-between settings.
Your camera may also have an additional setting: T (time), or B (bulb). These settings are designed to take longer exposures than the presetting offered on your camera. The bulb mode can be used for taking exposure from several seconds to hours.
With the “T” setting, you press the shutter release down to open the shutter. It stays open until you press the button again to close it. On some cameras you have to advance the film and cock the shutter for the next exposure.
With the “B” setting, you press the button down to open the shutter, which stays open as long as you hold the button down. When you release the button the shutter closes.
When using the “T” or “B” mode you will have to have your camera mounted on a tripod to reduce camera shake.
-------------------------------------------------------------------------------------
I have talked about aperture and how we can use it to control depth of field, now it’s time to take a look at shutter speeds.
What is a shutter? The shutter is a mechanism, which allows light to reach the film or digital sensor for a precise length of time.
Today most cameras are equipped with a mechanical or electronic shutter, which allows user to select speeds at a fraction of a second.
Sample of shutter speeds:
1- second
½ - second
¼ - second
1/8 – second
1/15 – second
1/30 – second
1/60 – second
1/125 – second
1/250 – second
1/500 – second
1/1000 – second
1/2000 – second
1/4000 – second
If you look at the sample picture below of the shutter dial you will notice these speeds are marked as: 1, 2, 4, 8, 16, 30, 60, 125, 250, 500, 1000, 2000, and 4000.

The sample picture of the shutter speed dial is from an old Nikon FE2 film camera. On newer digital cameras these setting will be found on a LCD screen. The speed settings remain the same from film to digital.( 1/100 on a film camera is the same as 1/100 on a digital camera)
IMPORTANT:
Notice: as you move from one speed to the next fastest speed, you cut the exposure time in half.
Example: 1/500 allows light to reach the film or digital sensor for half the time allowed by 1/250.
This is the function of the shutter speed; to control the light reaching your film or sensor. The shorter the time the less light, if you cut the time in half you have cut the light in half.
I have already discussed how we can control the light by changing the aperture. As you should know: the larger the aperture the more light is admitted, the smaller the aperture the less light.
So what have we learned? There are two ways to control the light entering your camera: Shutter Speed & Aperture.
Shutter Speed Settings
When using the older film cameras in manual mode you will set the shutter speed manually and most likely be forced to use one of the specific speeds indicated on the dial or LCD screen. On many older film cameras you simply don’t have a choice of setting the speed other than what’s indicated on the dial or LCD screen. You cant set an intermediate shutter speed of say 1/556. You’re simply forced to stick with the numbers on the dial.
If your camera offers aperture-priority the camera will set the exact exposure. In this setting you set the aperture and your camera will set the exact shutter speed for proper exposure. In this way it is possible to achieve the 1/556 setting or any other fraction within the cameras limits. Ordinarily you cannot set these in-between settings.
Your camera may also have an additional setting: T (time), or B (bulb). These settings are designed to take longer exposures than the presetting offered on your camera. The bulb mode can be used for taking exposure from several seconds to hours.
With the “T” setting, you press the shutter release down to open the shutter. It stays open until you press the button again to close it. On some cameras you have to advance the film and cock the shutter for the next exposure.
With the “B” setting, you press the button down to open the shutter, which stays open as long as you hold the button down. When you release the button the shutter closes.
When using the “T” or “B” mode you will have to have your camera mounted on a tripod to reduce camera shake.
-------------------------------------------------------------------------------------
Wednesday, August 5, 2009
Prt. 11 HYPERFOCAL
HYPERFOCAL
What is hyperfocal?
Hyperfocal is a setting on your lens, which give you the greatest possible depth-of-field.
Example: When you need everything in relatively sharp focus from a few feet away all the way out to hundreds of feet away.
Lets take a look at how you set your lens for hyperfocal.
1. Set your lens to the smallest aperture it will allow.
2. Center the infinity marker above the right handed smallest marking on the depth of field scale.
Look at the photo below of the manual focus 28mm lens. The aperture is set to its smallest setting f/22; the infinity marker is placed above the 22 on the depth-of-field scale. This brings infinity just within the depth-of-field and provides the greatest depth of field with this lens set at f/22.
The lens will now perform at it’s greatest depth-of-field, which is about 2 ½ feet to infinity. This is the maximum depth-of-field this lens will provide.

Take another look at the photo above; you will notice that the distance scale reads about 4 feet. This is the hyperfocal distance for this lens at f/22.
If light is an issue and you need to open the aperture a stop or two, this is no problem. Simply follow the previous steps: try using f/8 or any f/stop and see what you get.
F/8 will give you a distance of about 5 feet to infinity on the lens above. If you didn’t come up with that answer reread the information and try again.
APERTURE PRIORITY / SHUTTER PRIORITY
Every time we take a photo we need to decide on depth-of-field. How will the depth-of-field affect your photo, will a deep depth add strength to the composition or perhaps a shallow depth would be more appealing?
Many cameras have automatic exposure settings be it film or digital cameras. You can use these exposure settings to your advantage.
The two main settings are as follows:
1. Aperture Priority – You select the aperture and the camera automatically sets the shutter speed.
2. Shutter Priority – You select the shutter speed and the camera automatically set s the aperture.
Aperture priority allows you to maintain creative control of your image because you select the aperture and can decide on the depth-of-field you want.
Shutter priority offers no direct control over depth-of-field. The camera will choose the aperture for you. There is a trick you can use to overcome this; I will talk about this later.
Many cameras offer program modes, I will also discus this later.
-------------------------------------------------------------------------------------
Monday, July 27, 2009
Prt. 10 DEPTH OF FIELD
DEPTH OF FIELD
Simply put, depth of field is the distance from the front of your image to the back of the image that will be in focus.
Look at the photo of the ant. Notice that the ant is in focus but the near leaf and the background are out of focus. The point of focus is on the ant. This photo has a shallow depth of field. By using shallow depth of field I have made the ant stand out from its surroundings.

If I would have taken this photo with a greater depth of field imagine how distracting the image would be. Instead of the focus being on the ant, the leaves in the foreground and background would distract our eyes from the subject.
This doesn’t mean that you should always use shallow depth of field. Landscape photos strongly benefit from a deep depth of field. In the case of a sprawling landscape you may benefit having everything in focus from near to far.
How much depth of field you use in a photo depends upon what you are trying to convey in the photo. Its as simple as that. The important thing is knowing that you have a choice. You can control your depth of field. Depth of filed is a creative, important tool.
CONTROLING DEPTH OF FIELD – APERTURE
A very good way to control your depth of filed is through aperture. Compare the two photos below. Which has greater depth of field?
1. This image was shot at f/3.5
2. This image was shot at f/16
f/3.5

f/16

It’s obvious; the image shot at f/16 definitely has greater depth of filed.
REMEMBER:
The smaller the aperture the greater the depth of filed. (larger f-number)
The larger the aperture, the shallower the depth of filed. (smaller f-number)
The subjects in the photos above are no more than 2 inches tall and are spaced less than an inch apart. As you can see, even when objects are spaced only an inch apart by changing the aperture we have altered the depth of field.
Depth of field gives you a margin for error when focusing, the smaller the aperture the greater the margin.
Another way to change depth of field is to change the distance on which you focus.
Lets take a look at the two photos of the torches below. Both photos where shot at f/5.6. The photos were shot with a crop camera (Pentax K10D) with a 58mm manual focus Zeiss Biotar f/2 lens attached. The crop factor is 1.5, so I times that by 58mm, which equals 87mm. (this is the actual focal length of this lens on the Pentax digital camera).
I focused on the front torch, notice how the other torches are out of focus.
In the second photo I focused on the center torch.
#1

#2

We can see a huge difference in how much is sharp from photo to photo. The farther away you focus the greater the depth of field.
The second photo shows two torches and the background in focus, while the first photo only has the front torch in focus.
This is why you should take great care when focusing on near objects. Close focusing offers less depth of field; therefore there are fewer margins for error.
So, we now have learned two ways to control depth of field:
1. Use a small aperture
2. Focus on a point farther away, or move the camera farther from the subject.
DEPTH OF FIELD SCALE
A question that may be asked is” How much will be sharp in front of the point of focus and how much will be sharp in back of the point of focus?” It is very possible that the answer is on your lens.
Take out your lens and look at the marking on the barrel. Your lens may have a depth-of-field scale as shown in the picture below. If your lens has these markings then please proceed with the following exercise. If your lens does not have these markings, please read the information provided regardless, as this is important information.

Now lets take a look at the lens below and determine exactly how this scale is set.
In the photo you will notice that the distance scale is set at 3 ft, just shy of 1 meter. The aperture scale is set at f/16.
So what does the depth-of-field scale tell us?
f/16 28mm lens

With this lens set at distance of 3 ft. an aperture setting of f/16, the depth-of –field scale tells us our depth-of-field will run from about 2 ft. to about 6ft.
How do we know this?
Just take a look at the number 16 on both sides of your depth-of-field scale. By matching the depth-of-field scale to your ft. marker you have determined the distance.
So what happens if we set our aperture to f/8 and our distance scale to 3ft.?
Give it a try, just look at the photo and determine the answer.
Look at both 8 markers on the depth-of-field scale.
The answer would be about 2 1/2 ft. to about 4 ft.
So in conclusion you should always remember:
1. The smaller the aperture the greater the depth of field.
2. At any aperture, there is about twice the depth-of-field behind the point of focus as there is in front of it.
Now lets try changing the distance at which our lens is focused. Look at the picture below; you will see the same lens focused at 10 ft. So, what is the depth of field at f/8?
The scale tells us that the depth-of-filed runs from about 6 ft. to infinity.

The lens used for these samples is a 28mm lens. What would happen to the depth of field if we were to use a different focal length?
Lets experiment with a 50mm lens. If you have a 50mm lens take it out. Set the distance scale to 3 ft. and your aperture to f/16. Determine your depth-of-field. It should read about 2-½ ft. to about 4 ft. (Pic below)

Lets compare this reading to the picture of the 28mm lens set to the same distance and aperture. The reading of the 28mm lens gives us a depth-of –field of about 2 ft. to about 6ft. (Pic above marked f/16 28mm)
As you can see we have a greater depth of field with the 28mm lens. Check other f/stops and you will see the same results.
So, we have reached another conclusion:
3. The shorter the focal length of a lens, the greater the depth-of-field at any setting.
The longer the focal length of any lens, the less the depth-of-filed at any setting.
You may ask, “Why is this so important”?
Imagine your looking across a vast filed that stretches to a beautiful mountain scene, your puppy is playing in the field near you and you want to get the entire scene including your puppy into clear focus. You may discover that a 50mm lens may not be the best lens for this shot. As you have seen from the previous experiment, the 50mm lens may not provide enough depth-of-field at its smallest aperture for you to get your near-by puppy and the rest of the scene into clear focus. But a wide angle lens such as the 28mm may provide you with enough depth-of-field to get the job done.
If you wanted to shoot a subject such as a portrait where you isolate the head and shoulders of your model and throw everything else out of focus then you would be better off using a longer lens. It’s narrow depth-of-field can provide “selective focus” that you might not obtain with a shorter lens.
USEFUL TIPS ON DEPTH-OF-FIELD
Sharpness, what does it mean?
What do we mean by reasonably sharp? If we were to set a 50mm lens at a distance of 8ft. and an aperture of f/16, we would have a depth-of-field of about 5ft. to about 18 ft. Does this mean that an object 5 feet away or 18 feet away will be as sharply focused as an object 8 feet away?
No. Sharpness of focus is relative. In the example above objects 8 feet away are more sharply in focus than objects 5 feet or 18 feet away.
Here’s something to remember:
To be in focus, a point in the subject should appear as a point in the print when viewing film. On your monitor if you’re viewing digital images you will be looking at a pixel.
When viewing a film negative under a microscope, each precisely focused point in the negative is a tiny doughnut-shaped circle. The circle is so tiny that to the naked eye it appears to be a point. A digital print will have small square pixels.
A point in the subject that is slightly out of focus will appear under a microscope to be slightly larger. If however, it still looks like a point to the naked eye, we say it is acceptably in focus.
As we move farther and farther from our plane of focus the circles or pixels become progressively bigger and flatter until we no longer see them as points, but as tiny blurred circles or squares. We now say they are out of focus.
Lets go back to the paragraph where we were focusing on an object 8 feet away. Everything that is 8 feet away will from the camera will reproduces as tiny perfect circles or square pixels. We call this distance the plane of focus. What about the points an inch closer or farther away? They will be slightly larger and flatter but will appear as points to the naked eye.
The distance we call depth-of-field is the distance in front and in back of the plane of focus in which all points will reproduce as small enough and round enough, or square enough when referring to pixels, to be perceived as points when viewed by the naked eye.
So depth-of-field is really just a zone of acceptable sharpness.
Keep in mind; acceptable focus depends in part on the size of the print. For enlarged prints and projected slides you need very precise focusing.
ZONE FOCUSING
When shooting moving objects, you pre-set your distance scale and stop down your lens to give you the largest margin of error.
Simply pre-set your distance scale to the distance at which you will want to shoot. Whenever your subject enters these limits you are assured of a reasonably sharp image.
-------------------------------------------------------------------------------------
Thursday, July 16, 2009
Prt. 9 FOCUSING
FOCUSING
Many times a person new to photography will think they have an image in perfect focus, yet when they view the photo’s in Photoshop (or whatever processing software you may use), or when they get their film back (if they happen to be shooting film) they find the image is unclear, fuzzy, and not what they expected.
Images that are small may appear fine but when you try to make a larger print you find the image may become unacceptable. The objective is to achieve perfect focus that will hold up even when the image is enlarged to greater sizes.
With the nice auto-focus lenses that are offered today, you would think that this article is pointless, but what about the many great manual focus lenses that are out there? Many people are using some great old MF lenses on their new digital cameras.
Some samples :
In Focus

Out Of Focus

At first glance both pictures may seem passable, but when we take a 100% crop from each picture we can see the difference.
In Focus Crop

Out Of Focus Crop

As you can see it’s important to know your cameras focusing system. To achieve professional looking photos you need to be able to focus with perfection, “good enough” just won’t cut it. There are some basic professional techniques that will help you get perfect focus every time.
THE TECHNIQUES OF FOCUSING
How you focus your camera will depend upon the camera you are using. As I mentioned in an earlier post, different cameras use different focusing devices. Many cameras offer you a few choices of different techniques for focusing, allowing you to choose the method best suited for any given situation.
FIXED FOCUS
Some cameras (mostly inexpensive point and shoots), have fixed focus. You can’t change the focus. Objects that are more than a few feet from the camera are in fairly decent focus, while object closer than this distance are out of focus.
If your a professional, and plan on doing some creative work, you will need some way to vary the focus on your lens. Sometimes you will need to focus on objects sitting in the far distance, while other times you will need to focus close up. You want to be in perfect focus no matter what the distance. As I said, “good enough” wont cut it.
HOW A LENS FOCUSES
Focusing a lens requires moving the lens forward or backward in small increments. A standard SLR / DSLR employs lenses that require the user to twist the barrel on the lens to move it forward or backward, this can also be achieved by a motor built into your lens or camera body. By moving the lens you change the distance on which it is focused.
A good starting point to achieve good focus is to measure the distance to your subject, then set your lens for this distance. This may not be the typical approach, but it’s a good place to start and will help you begin to grasp focusing systems.
Bachrach Studios used this method for many years; they shot all their basic portraits using a string attached to the camera. The string consisted of knots each placed a foot apart. This allowed them to know exactly how far the subject was from the camera.
THE FOCUSING SCALE
Most lenses are equipped with a focus scale, also known a distance scale. The scale is a group of numbers marking the distance in feet / meters. If you’re unfamiliar with these numbers I suggest taking a look at one of your lenses.
In the center of your lens barrel you will find a marker. If you wanted to focus on an object that you knew was 5 feet away, you would simply line up the 5 foot marking with your center marker.Be aware that as you rotate the barrel to the 5ft. marker you also move the lens in or out. At the point when 5ft. lines up with the center marker, you have achieved the sharpest possible image for any object 5ft. from the lens.
If your subject where 8ft. away, you would simply line up the 8ft. mark with the center marker and so on.
Example:


Take a close look at the focusing scale on your lens. You will notice the distance markings go from the closest range your lens can focus to a distance called infinity beyond everything that is in focus. On most lenses infinity is marked with a symbol. (See photo below). Whenever you want to get distant objects into focus simply line up your infinity marker with the center marker.

Using the focusing scale by itself is not very convenient. You will find that in many cases you don’t know the exact distance to your subject, and you need to rely on your camera to figure it out for you.
What you need is a system that you can look into the viewfinder, point your camera toward the subject and do something that will bring the image into perfect focus. As I already mentioned there are a few systems that will allow you to do this.
1. Groundglass Focusing
2. Rangefinder Focusing
3. Automatic Focusing
GROUNDGLASS FOCUSSING
This is the most common viewing system. This is the system you will find on SLR’s, DSLR’s, Twin Lens Reflex (TLR’s), and View Cameras.
If you use a DSLR, when you look in the viewfinder you will see an image of your subject projected on the groundglass. One way you have to focus is by twisting the barrel of your lens until the subject becomes perfectly sharp. Once your subject appears perfectly sharp you will know the image reaching your sensor is perfectly sharp also.
You may ask, “How do I focus using ground glass”, or “How do I know when I have perfect focus?”
First and foremost you need to decide on which point of the subject area you want to focus on. This will all be a creative decision based upon what you, the photographer wants to convey. As a photographer you must decide on a theme you would like your photo to express. Once you have decide upon your theme, you usually would want to draw attention to most important part of your story by focusing in it. A good way to focus on your subject would be to throw everything else out of focus, which surrounds your main subject.
How about portrait’s, which part of the face should you focus on? I think it would be obvious the EYE’s are the windows to the soul, so focus upon the eyes
Once you have decided upon your focusing point, the question becomes “How do I achieve perfect focus?” The answer is, by zeroing in. Simply move your focus control in one direction until your image becomes perfectly sharp on your groundglass, keep turning your focus control past this point until the image starts to blur. Now move your control in the opposite direction until your image becomes perfectly sharp again. Move the focus control back and forth until you have zeroed in; you can also rock your upper body back and forth until perfect focus is achieved.
RANGEFINDER FOCUSING
Some SLR’s offer another method of focusing. In the viewfinder you find a small circle that will display a double image when the subject is out of focus. This is the same system used on many early SLR’s.
There are two types of Rangefinder images.
1. Superimposed
2. Split-image
The superimposed image will display two side-by-side images of your subject. To focus you bring them together until you see one image.
The split image system seems to be split across the middle, either horizontally or vertically. As you focus, the two halves will line up together.
A FEW TIPS
1. The closer you are to a subject the more important accurate focus becomes. The further your subject is from you the more tolerance you have with focusing. I your subject is 30 or 40 feet from you, your focus can be off a foot or so and you will still get a reasonably sharp image. But if your subject is 4 or 5 feet from you a difference of 1 inch in focus will cause an unacceptable image.
2. To reach perfect focus of a near object, get a perfectly focused image on your groundglass, and then rock your body back and forth a few inches while observing your subject. As soon as you see the sharpest image, shoot.
3. If you are shooting a moving object coming toward you or moving away, preselect and focus on a point at which you will want to take you photo.
4. To bring the distance into focus, simply set your distance scale to infinity. If you would like to have the distance and foreground in focus, set your lens to its hyper-focal setting. I will discuss hype-focal settings later in the lessons.
AUTOMATIC FOCUS
Here is the third and very popular focusing system. Simply point your camera at the subject, and it measures the distance, adjusts the lens and automatically brings the lens into focus.
Auto-focus systems for the most part work like radar. A beam of infra- red light or an inaudible sound is transmitted from the camera, bounces off the subject and is redirected back to a computer chip sensor in the camera. This chip will calculate the micro- seconds of time the beam took on its round trip journey and calculates the distance. The microchip instructs tiny servomotors to move the lens to bring it into focus.
FOCUS LOCK
Most modern 35mm DSLR / SLR offer focus lock To use focus lock, simply center your subject , focus, press the shutter-button halfway down, now your focus should be locked and you can reframe your image. Keep in mind that you need to keep the shutter button pressed half way down while you reframe your shot.
MANUAL OVERRIDE
Auto focus is a nice tool and it make life easier, but to gain full creative control over your camera you need to be in manual mode. Most SLR / DSLR give you this opportunity by offering manual focus override.
I know some people have weaker eyesight than others and feel they need auto focus, or perhaps you shoot fast paced sports and auto focus seems a necessity, this is all fine. Shoot which ever way makes you comfortable.
Friday, July 10, 2009
Prt.8 VIEWFINDERS
THE VIEWFINDER
Before we take a photo we peer through our viewfinder to see what the image will look like before pressing our shutter release button. This is the first function of the viewfinder.
Your viewfinder can have a second function also. It may allow you to focus the image while viewing it. In most cases the viewing system and focusing system go hand in hand.
I will try to relate the different viewing systems to the focus systems they employ.
The Major Viewfinder Systems:
1. Optical viewfinder
2. Single-lens reflex viewfinder
3. Twin-lens reflex viewfinder
4. Ground-glass back
5. Electronic video viewfinder
THE OPTICAL VIEWFINDER
The optical viewfinder is a fairly simple and direct design. It is a simple small glass window, which faces the same direction as your lens. You can find this system on many old point and shoot film cameras and also on some very nice 35mm rangefinder cameras.
An Old Kodak Tourist Camera (Note the viewfinder)

This system does have a major drawback. You cannot focus by looking through the viewfinder. The image you see in the viewfinder will always be in focus. You need some way to focus the image that reaches the film or sensor.
A CLOSER LOOK AT THE VIEWFINDER

Here are three ways the problem is solved by three separate cameras.
1. Fixed Focus
2. Rangefinder
3. Auto-Focus
FIXED FOCUS
The very simple point-and-shoot cameras had instructions, which told you anything more than 5 feet or so away will be in focus, as simple as that. If you try to shoot anything closer than the 5-foot range your image would be out of focus even if it looked in focus through your viewfinder. This is a very limited system indeed.
What we need is a more precise system. We need to gain control of our systems for more creative work.
RANGEFINDER SYSTEM
Rangefinder cameras employ a focusing system that was used on most early 35mm cameras.
Rangefinder use mirrors and levers to link the image reaching the film to the image you see in the viewfinder. If your image is out of focus you see an imperfect image in your viewfinder. Usually it will be an image split across the middle but some systems show a double image similar to ghosting on your TV screen. As long as this image is imperfect you know the image reaching the film is out of focus. Simply turn the barrel of your lens until the image your viewing in the viewfinder is perfect.
Be certain that your Rangefinder is in proper working order. With all the mechanical levers it is easy to have bad linkage to the viewfinder. If your camera is working properly then a clear image in the viewfinder will certainly produce a sharp image on your film.
Parallax error is a common problem with rangefinder systems. This normally occurs when shooting an object close up. I will cover this later.
Last but not least; remember to remove your lens cap. This may seem like a no brainier, but believe me, it’s easy to forget to remove the lens cap when using this type of viewfinder. You will always see a nice bright image, even when your lens cap is on.
The rangefinder system is by no means perfect; this is why the SLR systems became so popular. The SLR solves these problems.
The rangefinder despite it’s limitations remains popular.
Two good reasons:
1. Low-light shooting. The rangefinder displays a much brighter image than an SLR.
2. Rangefinder are much quieter than SLR cameras.
AUTO-FOCUS CAMERAS
I will concentrate on the point-and-shoot cameras. Also known as “idiot boxes”, “goof-proof”, and various other names.
Point-and –shoot cameras use an optical viewfinder, a window that displays the image always in focus. The window will have a target or small aiming device. You simply aim the target at the subject you want to shoot. Computer chips in the camera measure the distance to the subject and instruct tiny motors to move the lens to bring your subject into focus.
Much like the rangefinder camera you don’t see the exact image that is entering your lens. You can’t be certain of the exact image that is reaching the film.
You simply trust the computer to do its job.
SINGLE-LENS REFLEX SLR/DSLR
This system employs a mirror and a prism, which enables you to view your subject directly through the lens.
This system contains a movable mirror placed at a 45-degree angle in front of the film plain or sensor, light entering the lens is reflected by the mirror upward onto ground glass.
Today’s SLR’s employ a five sided prism (a pentaprism). The prism bounces the image around until it is viewed right side up and correct from left to right. Earlier SLR had waist level viewers, which showed the image up right but reversed from left to right.
On almost all SLR’s there is a shutter directly in front of the film or sensor. This shutter is located at the plane of the film or sensor and is called a focal plane shutter. While your looking through your viewfinder the shutter is closed so no light reaches the film or sensor.
The mirror is hinged. When you press your shutter release the mirror snaps up out of the way allowing light to reach the film or sensor. In most cameras the mirror will have an instant return, it will snap back into position as soon as the shutter closes.
A NIKON EL SLR CAMERA

Drawbacks:
1. Blackout – from the instant your photo is shot the viewfinder goes black. Really this isn’t much of a problem with the instant return mirrors. This will only last a fraction of a second or so.
2. Noise- your mirror snaps into position causing a loud slapping sound. This can be a problem when shooting in areas that require extreme quiet.
3. Shudder- believe it or not the mirror slapping into position can cause your camera to shudder. When your shooting at fast speeds this is not a problem. While doing precision work this can cause headaches, especially while using a telephoto lens in low light.
A major problem with SLR viewing occurs while shooting at smaller f/stops. At f/22 only a very small amount of light is able to enter the lens. Since the light entering the lens is dim the image you see in the viewfinder will also be dim. This can make focusing nearly impossible.
A simple fix is to open your lens to its widest aperture, say f/1.8. This allows for the greatest amount of light to enter your lens. Focus your image, then stop down to the f/stop you need, such as f/22 and shoot.
TWIN-LENS REFLEX
The viewfinder on a Twin-Lens Reflex produces an image that is nearly identical to the film image size.
The Twin-Lens Reflex (TLR) has two lenses, one directly above the other. The lower lens transmits the image that strikes the film while the upper lens transmits an image that is for viewing and focusing. The image you view is nearly identical to the image that strikes the film.
Operation: Light passes through the upper lens and strikes a mirror at a 45-degree angle, and is reflected upward onto a horizontal ground glass viewing screen. The image size on the ground glass is the same as the image size on the film. The upper lens is connected to the lower lens via a gear type system. By moving one lens you automatically move the other lens by the same amount. As you focus the image in the viewfinder via the upper lens, you are automatically adjusting the lower lens for perfect focus, so the image reaching your film we be as sharp as the image you view in the finder.
TLR’s use larger film, known as 120 and 220 film. Normal operation of a TLR requires the user to hold it at waist level and look down into the viewfinder. The image you see in the viewfinder is correct from top to bottom, but is reversed from right to left.
Drawbacks:
1. The viewfinder is not as bright as an optical viewfinder or rangefinder.
2. Without a special attachment known as a porro-finder you’re forced to look down into the viewfinder from waist level.
3. Parallax error when photographing close objects.
4. Two lenses are needed instead of one.
5. Limited option on available lenses.
GROUNDGLASS BACK
Groundglass viewing is the system used on studio and view cameras. The entire back of the camera, where the film will be inserted after viewing and focusing, is composed of a sheet of glass which is smooth on one side and ground to a satin like finish on the other.
The image you view on the groundglass will be exactly the same size as the image produced on film. You focus directly on the groundglass.
The image on the groundglass is upside down and reversed from left to right.
The image on the groundglass tends to be rather dim. Most viewfinder used , cover the groundglass and there heard with a hood, or black cloth to cut out any extraneous light. Therefore making the image viewable.
LCD / LIVE VIEW
LCD (Liquid Crystal Display) on your digital SLR camera allows you to view the image on your LCD screen before you actually take the photo.
This is an added bonus. Not only do you have the option of using your viewfinder, now you have a second way to compose your images.
With the image displayed on the screen, composing a photo can become a snap.
Not all DSLR’s are equipped with Live View.
Wednesday, July 8, 2009
Prt.7 Perspective Distrortion / Linear Distortion
PERSPECTIVE DISTORTION / LINEAR DISTORTION
We all have taken photos with wide-angle lenses while standing too close to our subject. The results from this technique can be very amusing, bordering on comedic. We get a distorted image of the model we photographed. This may be amusing for family and friends, but what about a paying client who wants an aesthetically perfect print?
Here one such example.

Why does this distortion occur? Lets take a look at normal perspective. One way our eye perceives near or far is by the relative size of a given object. Our mind tells us those objects further away are appear smaller.
Here’s another view, the closer the object, the stronger the effect of perspective.
If you were to photograph a train with 100 cars attached moving toward you and snapped a shot of the front engine about 15 feet from you, the engine will appear much larger than the rest of the cars. But if you photograph the train from 100 feet the difference in size between the engine and the rest of the train would not be so great.
This is true of all lenses:
The farther away an object, the smaller it appears.
The farther away the lens is from an object, the less the change in apparent size.
I hope this helps you to see why a wide-angle lens will cause perspective distortion. When we shoot with a wide-angle lens we tend to get closer to the subject before taking the picture. The closer you are the stronger the perspective effect.
Wide-angle lenses do not distort perspective any more than any other lens, provided you shoot your subject from the same distance as with all lenses. If you shoot a subject from 15 feet with a 100mm lens, 50mm lens, and a 24mm lens, the perspective will be the same provided you maintain the exact position. Simply crop the same portion of all your photos to the same size and you will see this is true. The perspective will be the same from all lenses.
The tip of the human nose is about an inch closer to the camera than the rest of the face. Because closer objects appear larger, the nose when shot up close will appear larger than the rest of the face. A wide-angle lens will make the distortion pronounced. Why? Because we need to fill the frame with our image and to do this we need to get closer with a wide-angle lens than we would with longer focal lengths. When you come in close with any size lens the distortion will be pronounced. The closer you are the more the distortion.
What about telephoto lenses?
Perspective distortion gets less and less as the subject gets farther away. Things begin to flatten out. Objects that are far away appear to stack on top of each other. This is a bit like reverse distortion, this effect is common when you shoot with a telephoto lens.
Because the subjects are very far from the camera you produce a flattened perspective.
LINEAR DISTORTION
Lines that are actually parallel do not appear to be parallel. This is linear distortion.
Have you ever taken a picture of a tall building and the photo looks as if the building is leaning when in reality it is not?
Linear Didtortion

Another perspective.

Perhaps you used a wide angle lens feeling that this would help to capture the entire building if you just aimed up a little bit.
What happens is by aiming upward you cause the sides of the building to converge toward the center creating normal perspective of depth. This would look natural if you take your shot from dead center of the building. What happens if your position is off? Well, the sides of the structure will not converge at the same angle. You may get an image where one wall appears straight up and down while the other wall is at a 30-degree angle.
Can you correct this problem? Sure, the answer is quite easy. Simply keep the back of your camera parallel to the face of the structure you are photographing. If you cant get the entire building in view simply move back or try a wider-angle lens.
Another option is a view camera. I wont cover that in this lesson; I will just stick to 35mm cameras.
But there is another option for the 35mm cameras, its called a PC lens. (Perspective control). The face of these lenses screw upwards, downwards, and sideways. As you look through your viewfinder you can see the image changing with the position of the lens. Just keep changing the lens position until you seethe image you want.
PC lenses do have limitations. First and foremost, they are expensive. Second, they have only a limited range of adjustment. If you think you can pull in the Sears Tower from across the street, forget it., you’ll need a view camera for that.
THE FISH-EYE LENS
A fish-eye is a lens of such extreme short focal length that its angle of view is close to 180 degrees. 16mm or less are generally considered fish-eye lenses.
When you hold a fish-eye at eye level and shoot straight ahead, the lens will take in everything in the hemisphere of space in front of you. The image will usually form a circle within a frame and not fill the rectangle. Distortion is tremendous, with perspective lines radiating out from the center directions. A straight line through the center will remain straight. Straight lines through any other part of the picture will curve.
Subscribe to:
Posts (Atom)