A Free Photography Course


Friday, July 10, 2009

Prt.8 VIEWFINDERS

THE VIEWFINDER

Before we take a photo we peer through our viewfinder to see what the image will look like before pressing our shutter release button. This is the first function of the viewfinder.

Your viewfinder can have a second function also. It may allow you to focus the image while viewing it. In most cases the viewing system and focusing system go hand in hand.

I will try to relate the different viewing systems to the focus systems they employ.

The Major Viewfinder Systems:

1. Optical viewfinder
2. Single-lens reflex viewfinder
3. Twin-lens reflex viewfinder
4. Ground-glass back
5. Electronic video viewfinder

THE OPTICAL VIEWFINDER

The optical viewfinder is a fairly simple and direct design. It is a simple small glass window, which faces the same direction as your lens. You can find this system on many old point and shoot film cameras and also on some very nice 35mm rangefinder cameras.

An Old Kodak Tourist Camera (Note the viewfinder)


This system does have a major drawback. You cannot focus by looking through the viewfinder. The image you see in the viewfinder will always be in focus. You need some way to focus the image that reaches the film or sensor.

A CLOSER LOOK AT THE VIEWFINDER


Here are three ways the problem is solved by three separate cameras.

1. Fixed Focus
2. Rangefinder
3. Auto-Focus

FIXED FOCUS

The very simple point-and-shoot cameras had instructions, which told you anything more than 5 feet or so away will be in focus, as simple as that. If you try to shoot anything closer than the 5-foot range your image would be out of focus even if it looked in focus through your viewfinder. This is a very limited system indeed.

What we need is a more precise system. We need to gain control of our systems for more creative work.

RANGEFINDER SYSTEM

Rangefinder cameras employ a focusing system that was used on most early 35mm cameras.

Rangefinder use mirrors and levers to link the image reaching the film to the image you see in the viewfinder. If your image is out of focus you see an imperfect image in your viewfinder. Usually it will be an image split across the middle but some systems show a double image similar to ghosting on your TV screen. As long as this image is imperfect you know the image reaching the film is out of focus. Simply turn the barrel of your lens until the image your viewing in the viewfinder is perfect.

Be certain that your Rangefinder is in proper working order. With all the mechanical levers it is easy to have bad linkage to the viewfinder. If your camera is working properly then a clear image in the viewfinder will certainly produce a sharp image on your film.

Parallax error is a common problem with rangefinder systems. This normally occurs when shooting an object close up. I will cover this later.

Last but not least; remember to remove your lens cap. This may seem like a no brainier, but believe me, it’s easy to forget to remove the lens cap when using this type of viewfinder. You will always see a nice bright image, even when your lens cap is on.

The rangefinder system is by no means perfect; this is why the SLR systems became so popular. The SLR solves these problems.

The rangefinder despite it’s limitations remains popular.

Two good reasons:

1. Low-light shooting. The rangefinder displays a much brighter image than an SLR.
2. Rangefinder are much quieter than SLR cameras.

AUTO-FOCUS CAMERAS

I will concentrate on the point-and-shoot cameras. Also known as “idiot boxes”, “goof-proof”, and various other names.

Point-and –shoot cameras use an optical viewfinder, a window that displays the image always in focus. The window will have a target or small aiming device. You simply aim the target at the subject you want to shoot. Computer chips in the camera measure the distance to the subject and instruct tiny motors to move the lens to bring your subject into focus.

Much like the rangefinder camera you don’t see the exact image that is entering your lens. You can’t be certain of the exact image that is reaching the film.

You simply trust the computer to do its job.

SINGLE-LENS REFLEX SLR/DSLR

This system employs a mirror and a prism, which enables you to view your subject directly through the lens.

This system contains a movable mirror placed at a 45-degree angle in front of the film plain or sensor, light entering the lens is reflected by the mirror upward onto ground glass.

Today’s SLR’s employ a five sided prism (a pentaprism). The prism bounces the image around until it is viewed right side up and correct from left to right. Earlier SLR had waist level viewers, which showed the image up right but reversed from left to right.

On almost all SLR’s there is a shutter directly in front of the film or sensor. This shutter is located at the plane of the film or sensor and is called a focal plane shutter. While your looking through your viewfinder the shutter is closed so no light reaches the film or sensor.

The mirror is hinged. When you press your shutter release the mirror snaps up out of the way allowing light to reach the film or sensor. In most cameras the mirror will have an instant return, it will snap back into position as soon as the shutter closes.

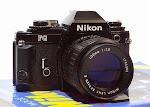
A NIKON EL SLR CAMERA


Drawbacks:

1. Blackout – from the instant your photo is shot the viewfinder goes black. Really this isn’t much of a problem with the instant return mirrors. This will only last a fraction of a second or so.

2. Noise- your mirror snaps into position causing a loud slapping sound. This can be a problem when shooting in areas that require extreme quiet.

3. Shudder- believe it or not the mirror slapping into position can cause your camera to shudder. When your shooting at fast speeds this is not a problem. While doing precision work this can cause headaches, especially while using a telephoto lens in low light.

A major problem with SLR viewing occurs while shooting at smaller f/stops. At f/22 only a very small amount of light is able to enter the lens. Since the light entering the lens is dim the image you see in the viewfinder will also be dim. This can make focusing nearly impossible.

A simple fix is to open your lens to its widest aperture, say f/1.8. This allows for the greatest amount of light to enter your lens. Focus your image, then stop down to the f/stop you need, such as f/22 and shoot.

TWIN-LENS REFLEX

The viewfinder on a Twin-Lens Reflex produces an image that is nearly identical to the film image size.

The Twin-Lens Reflex (TLR) has two lenses, one directly above the other. The lower lens transmits the image that strikes the film while the upper lens transmits an image that is for viewing and focusing. The image you view is nearly identical to the image that strikes the film.

Operation: Light passes through the upper lens and strikes a mirror at a 45-degree angle, and is reflected upward onto a horizontal ground glass viewing screen. The image size on the ground glass is the same as the image size on the film. The upper lens is connected to the lower lens via a gear type system. By moving one lens you automatically move the other lens by the same amount. As you focus the image in the viewfinder via the upper lens, you are automatically adjusting the lower lens for perfect focus, so the image reaching your film we be as sharp as the image you view in the finder.

TLR’s use larger film, known as 120 and 220 film. Normal operation of a TLR requires the user to hold it at waist level and look down into the viewfinder. The image you see in the viewfinder is correct from top to bottom, but is reversed from right to left.

Drawbacks:

1. The viewfinder is not as bright as an optical viewfinder or rangefinder.

2. Without a special attachment known as a porro-finder you’re forced to look down into the viewfinder from waist level.

3. Parallax error when photographing close objects.

4. Two lenses are needed instead of one.

5. Limited option on available lenses.

GROUNDGLASS BACK

Groundglass viewing is the system used on studio and view cameras. The entire back of the camera, where the film will be inserted after viewing and focusing, is composed of a sheet of glass which is smooth on one side and ground to a satin like finish on the other.

The image you view on the groundglass will be exactly the same size as the image produced on film. You focus directly on the groundglass.

The image on the groundglass is upside down and reversed from left to right.

The image on the groundglass tends to be rather dim. Most viewfinder used , cover the groundglass and there heard with a hood, or black cloth to cut out any extraneous light. Therefore making the image viewable.

LCD / LIVE VIEW

LCD (Liquid Crystal Display) on your digital SLR camera allows you to view the image on your LCD screen before you actually take the photo.

This is an added bonus. Not only do you have the option of using your viewfinder, now you have a second way to compose your images.

With the image displayed on the screen, composing a photo can become a snap.

Not all DSLR’s are equipped with Live View.

Wednesday, July 8, 2009

Prt.7 Perspective Distrortion / Linear Distortion

PERSPECTIVE DISTORTION / LINEAR DISTORTION

We all have taken photos with wide-angle lenses while standing too close to our subject. The results from this technique can be very amusing, bordering on comedic. We get a distorted image of the model we photographed. This may be amusing for family and friends, but what about a paying client who wants an aesthetically perfect print?

Here one such example.


Why does this distortion occur? Lets take a look at normal perspective. One way our eye perceives near or far is by the relative size of a given object. Our mind tells us those objects further away are appear smaller.

Here’s another view, the closer the object, the stronger the effect of perspective.

If you were to photograph a train with 100 cars attached moving toward you and snapped a shot of the front engine about 15 feet from you, the engine will appear much larger than the rest of the cars. But if you photograph the train from 100 feet the difference in size between the engine and the rest of the train would not be so great.

This is true of all lenses:

The farther away an object, the smaller it appears.

The farther away the lens is from an object, the less the change in apparent size.

I hope this helps you to see why a wide-angle lens will cause perspective distortion. When we shoot with a wide-angle lens we tend to get closer to the subject before taking the picture. The closer you are the stronger the perspective effect.

Wide-angle lenses do not distort perspective any more than any other lens, provided you shoot your subject from the same distance as with all lenses. If you shoot a subject from 15 feet with a 100mm lens, 50mm lens, and a 24mm lens, the perspective will be the same provided you maintain the exact position. Simply crop the same portion of all your photos to the same size and you will see this is true. The perspective will be the same from all lenses.

The tip of the human nose is about an inch closer to the camera than the rest of the face. Because closer objects appear larger, the nose when shot up close will appear larger than the rest of the face. A wide-angle lens will make the distortion pronounced. Why? Because we need to fill the frame with our image and to do this we need to get closer with a wide-angle lens than we would with longer focal lengths. When you come in close with any size lens the distortion will be pronounced. The closer you are the more the distortion.

What about telephoto lenses?

Perspective distortion gets less and less as the subject gets farther away. Things begin to flatten out. Objects that are far away appear to stack on top of each other. This is a bit like reverse distortion, this effect is common when you shoot with a telephoto lens.

Because the subjects are very far from the camera you produce a flattened perspective.

LINEAR DISTORTION

Lines that are actually parallel do not appear to be parallel. This is linear distortion.

Have you ever taken a picture of a tall building and the photo looks as if the building is leaning when in reality it is not?

Linear Didtortion


Another perspective.


Perhaps you used a wide angle lens feeling that this would help to capture the entire building if you just aimed up a little bit.

What happens is by aiming upward you cause the sides of the building to converge toward the center creating normal perspective of depth. This would look natural if you take your shot from dead center of the building. What happens if your position is off? Well, the sides of the structure will not converge at the same angle. You may get an image where one wall appears straight up and down while the other wall is at a 30-degree angle.

Can you correct this problem? Sure, the answer is quite easy. Simply keep the back of your camera parallel to the face of the structure you are photographing. If you cant get the entire building in view simply move back or try a wider-angle lens.

Another option is a view camera. I wont cover that in this lesson; I will just stick to 35mm cameras.

But there is another option for the 35mm cameras, its called a PC lens. (Perspective control). The face of these lenses screw upwards, downwards, and sideways. As you look through your viewfinder you can see the image changing with the position of the lens. Just keep changing the lens position until you seethe image you want.

PC lenses do have limitations. First and foremost, they are expensive. Second, they have only a limited range of adjustment. If you think you can pull in the Sears Tower from across the street, forget it., you’ll need a view camera for that.

THE FISH-EYE LENS

A fish-eye is a lens of such extreme short focal length that its angle of view is close to 180 degrees. 16mm or less are generally considered fish-eye lenses.

When you hold a fish-eye at eye level and shoot straight ahead, the lens will take in everything in the hemisphere of space in front of you. The image will usually form a circle within a frame and not fill the rectangle. Distortion is tremendous, with perspective lines radiating out from the center directions. A straight line through the center will remain straight. Straight lines through any other part of the picture will curve.

Tuesday, July 7, 2009

Prt. 6 Lenses Continued

LONG LENSES

Long lenses tend to be large and bulky. Many people tend to leave the longer lenses at home when they go out for a day trip. Nobody wants to lug around a big, heavy lens all day.

A TYPICAL 400mm LENS


The very good long lenses also tend to be quite pricey.

The longer the focal length of your lens the more steady the camera must be to avoid blurring the image.

A general rule in photography: Only hand- hold a lens when your shutter speed is equal to or faster than your lens focal length.

Example: A 200mm lens should not be hand held at speeds under 1/200th of a second. Any speed equal to or greater than the focal length should be fine.

As you can see most telephoto lenses will need to be mounted on a tripod for maximum performance. Now you not only have a large lens to lug around but also a heavy tripod.

One last point, no matter how good your lens is, when taking photos from a great distance your image is at the mercy of atmospheric conditions. Dust, haze and other elements can hamper your efforts of obtaining a sharp image.

TELE-CONVERTER / DOUBLERS

There are ways of getting around using telephoto lens.

A doubler or tele-converter magnifies the image; you attach the doubler to your lens. You then mount the lens to your camera body.

Example: 135mm lens with an added doubler becomes a 270mm lens.

There are different size converter such 3x tele-converters or smaller.

Tele-converter will degrade your image. You may be able to find a good converter with multiple elements, but any added glass to your lens will always degrade the image in some manor.

A 2X tele-converter M42 mount.


If you do decide to use a tele converter be aware that the converter will cause a loss of light. If your using a through the lens meter, such as the type found on most new SLR’s and DSLR’s you wont have to compensate for the loss of light. If your using a hand held meter then you have to make corrections for the light loss.

Example:

2X converter - open up 2 stops

3X converter - open up 3 stops


THE CAT LENS / MIRROR LENS

The Cat lens is a catadioptric lens. A catadioptric lens is a telephoto lens that uses a curved mirror to increase the size of an image.

The design of the Cat lens enables a very long focal length to be obtained in a short barrel. A 500mm Cat lens can be as short as 4 inches long. Compared to a normal 500mm lens, which can be as long 12 inches or more, this is quite an advantage.

A Cat lens does have a drawback. The best catadioptric lens does not produce as sharp of an image as the equivalent telephoto lens. Although with today’s technology some very good catadioptric lenses have been manufactured.

Catadioptric lenses do not have variable diaphragms. The aperture is fixed usually at f/8 or f/11 and cannot be adjusted.

An inconvenience? When I discuss depth of field the inconvenience will become apparent.

ZOOM LENS

Zoom lenses are quite convenient. A zoom lens will allow you to change focal length without changing lenses. A 35mm – 105mm zoom lens can be adjusted by simply turning the barrel in most cases; some lenses have a push – pull type adjustment.

Nikkor 35mm-105mm MF zoom lens.


Zoom lenses have a complex optic design causing most zoom lenses to be heavy and a bit bulky. Also, most zoom lenses are not as sharp at any given focal length as their fixed length equivalent.

There have been many changes in the design of newer zoom lenses. With the new computer designed lenses the optics and bulk have improved dramatically.. You can find some very sharp zoom lenses, but most of these come with a hefty price tag.

Some zoom lenses are designed with two separate control rings. One ring controls focus while the other focal length. Once you have set the focus you cannot accidentally change the focus while adjusting your focal length.

The push – pull zoom lens is a one-control ring function design. You twist the ring to focus and push or pull the ring to adjust focal length. It is very easy to lose your sharp focus while adjusting your focal length, so careful use is required for razor sharp images.

THE MACRO LENS

A macro lens is a close focusing lens. Some macro lenses will allow you to focus close enough to obtain an image that is about the same size as in real life.

Fujinon EBC 55mm macro 1:3.5 M42 mount


The relationship to the size of the image on film or digital sensor to the size of the actual object is called the reproduction ratio. A ratio of 1:1 (one to one) means that a life size image is produced on film/digital sensor. A 1:2 ratio means the image produced is one half the size of the actual object, and 1:3 is a one third the size of actual object.

Common terminology:

Macro lens – reproduction ratio of about 1:1

Macro- Focusing lens – reproduction ratio between 1:1.2 and 1:2

Close- Focusing lens – reproduction ratio between 1:2 and 1:4

A macro lens can be a lens of any focal length, although they tend to be of medium focal length. Common macro lenses may be a 55mm, 100mm, and 70-180mm macro zoom. This simply means that in addition to its focal length it can be used to focus closer than a standard lens to create life size images.

PORTRAIT LENS

A good portrait lens produces an image free of perspective distortion. We want the nose of the model to be proportionate to the models face. We also don’t want to flatten out the models face.

A good portrait lens will produce an image that flatters the model.

85mm to 135mm lenses should produce the most flattering images for portrait work.

A GOOD 35mm FILM PORTRAIT LENS


A GOOD PORTRAIT LENS FOR A CROP DIGITAL


Keep in mind that on a crop digital camera you have to multiply the focal length by the crop factor. So, a 58mm lens will function as a 87mm lens when multiplied by 1.5. This would make a good portrait lens on a digital crop camera.

Monday, July 6, 2009

Prt. 5 Normal, Wide, and Telephoto

If we were to see the world through a 20mm lens we would be able to see a wide scene, a vast area of coverage, a very scenic view. A 20mm lens is considered a wide-angle lens. Now, if we switched our perspective and seen the world through a 300mm lens we would cut down our angle of view and only see a small portion of the entire scene. A 300mm lens is conceded a telephoto lens.

A 50mm lens is not very wide nor is it really telescopic. For this reason it’s known as a normal lens. Why do we call it “normal”? It’s called a normal lens because it takes in an angle of view that is about the normal field of view we see the world around us.

A NORMAL LENS FOR 35mm FILM CAMERAS.


Lenses that cover wider fields of view are called wide-angle lenses while those that cover a narrower filed are called telephoto lenses.

50mm lenses are not normal lenses for all cameras. The larger the negative, the longer the focal length needed to create an image covering the normal field of view. This applies to digital cameras also. Some digital cameras will have a crop factor such as 1.5. Multiply the crop factor by your lens size to determine the proper focal length. Other digital cameras are full frame so the general film rule applies.

With a 35mm film camera a 50mm lens is considered normal.

Other normal lenses for different film sizes follow,

FILM CAMERAS

35mm = 50mm (normal)

21/4 x 21/4 = 75mm (normal)

4 x 5 = 150 (normal)

8 x 10 = 300mm (normal)

DIGITAL CROP FACTOR

1.5 crop = 35mm (normal) this equals 52.5mm equivalent to film.

1.4 crop = 35mm (normal) 49mm equivalent to film.

And so forth.

This is all approximation. Any lens between 40mm and 60mm could be considered a normal lens for a 35mm film camera. Same is said for the larger film sizes.

We can look at this from a different perspective. Lets try measuring the diagonal dimensions of a picture frame. The diagonal measurement of a 35mm frame is about 50mm long. There for the normal lens size for this film is about 50mm or there about. Same is to be said for other film sizes.

Remember that regardless of film size, the shorter the focal length, the wider it’s field of view. The longer the focal length the narrower it’s field of view.

TELEPHOTO

Previously I discussed the focal length as being the distance from the center of the lens to the film plane when focused at infinity. This would imply that the length of the lens barrel would have to be approximately the same length as the focal length. So, a 100mm lens would have to be 100mm long. But when measuring your lenses you will find that many are considerably shorter than their focal lengths.

Why? There are special lens elements that magnify the image. This enables a telephoto lens to be constructed in a shorter barrel, a lens that is as long as its focal length is generally called a long focus lens. Since most long lenses are of telephoto design, the term telephoto is applied (and sometimes misapplied).

A typical telephoto lens.


ANGLE OF COVERAGE

The angle of coverage depends on the lens focal length; the longer the lens focal length the narrower the angle of coverage.

Here are a few samples:

8mm = 180 degree angle of coverage.

28mm = 75 degree angle of coverage.

35mm = 63 degree angle of coverage.

50mm = 43 degree angle of coverage.

85mm = 29 degree angle of coverage.

135mm = 18 degree angle of coverage.

250mm = 10 degree angle of coverage.

350mm = 7 ½ degree angle of coverage.

500mm = 5 degree angle of coverage.

Prt. 4 Focal Length / F-stops

When talking about the speed of a lens it becomes necessary to examine the focal lengths of lenses. The focal length of a lens is the distance from the center of the lens to the image it forms on the film plane or sensor.

The focal length you chose will determine how large the image forms on your film or digital sensor.

Example: Shooting with a 135mm lens 10 feet away from your subject will form a larger image on your film plane or sensor than shooting with a 35mm lens from the same distance.

Another way to look at the focal length: A 200mm lens will produce an image twice as high and twice as wide as a 100mm lens. A 100mm will produce an image twice as high and twice as wide as a 50mm lens. And so forth.

How do we measure the focal length of any given lens? The answer is simple. There are three ways to measure the focal length of a lens, inches (in.), centimeters (cm), and millimeters (mm). Millimeters are the most common measurement for 35mm lenses.

There are about 25mm to an inch so a 55mm lens would be the equivalent of a 2.2 inch lens, or there about,a 50mm lens about 2 inches as pictured below.


LENS APERTURES

I have discussed the aperture (iris) opening in a previous post. I covered how a large opening admits the most light and the larger the opening the faster the lens.

Samples of aperture openings.


Lets take a closer look at the aperture and how it relates to the focal length of a lens.

In photography we are not just interested in how much light enters the camera. Our concern is how much light reaches the film or digital sensor. This is determined on how far the lens is from the film or digital sensor.

The closer the lens is to the film or sensor the more potent the light source will be. The farther the lens the less potent the light source becomes.

Example: Take two lenses with the same size aperture. Both lenses will let the same amount of light in. If both lenses are the same distance from the film or digital sensor they will each let the same amount of light reach the film or sensor. What happens if one lens is closer than the other?

Lenses with short focal lengths are shorter in length than those with larger focal lengths. Being that a short focal length lens is shorter in length also means that is sits closer to the film or digital sensor. If its closer to the film or sensor it will allow more light to reach the film or sensor than the longer focal length lens.By using various focal lengths we can control the amount of light, which reaches our film or digital sensor. Is this practical? Do we have other options? The answer is “yes”.

We could simply vary the size of our aperture.

We don’t have to calculate our exposure by relating the two variables. (Focal length and aperture). A system has been designed that combines both variables into one number; the f-number system.

An aperture of f/5.6 lets a specific amount of light reach your film or digital sensor. Any lens set at f/5.6 will admit the same amount of light to your film or sensor. Let your exposure meter tell you what f/stop to use then set your lens to the appropriate number. This will apply to all focal lengths.

The f/stop system allows you to calculate proper exposure regardless of the camera or lens you are using. The f/stop is an important tool, a tool you will use extensively in photography.